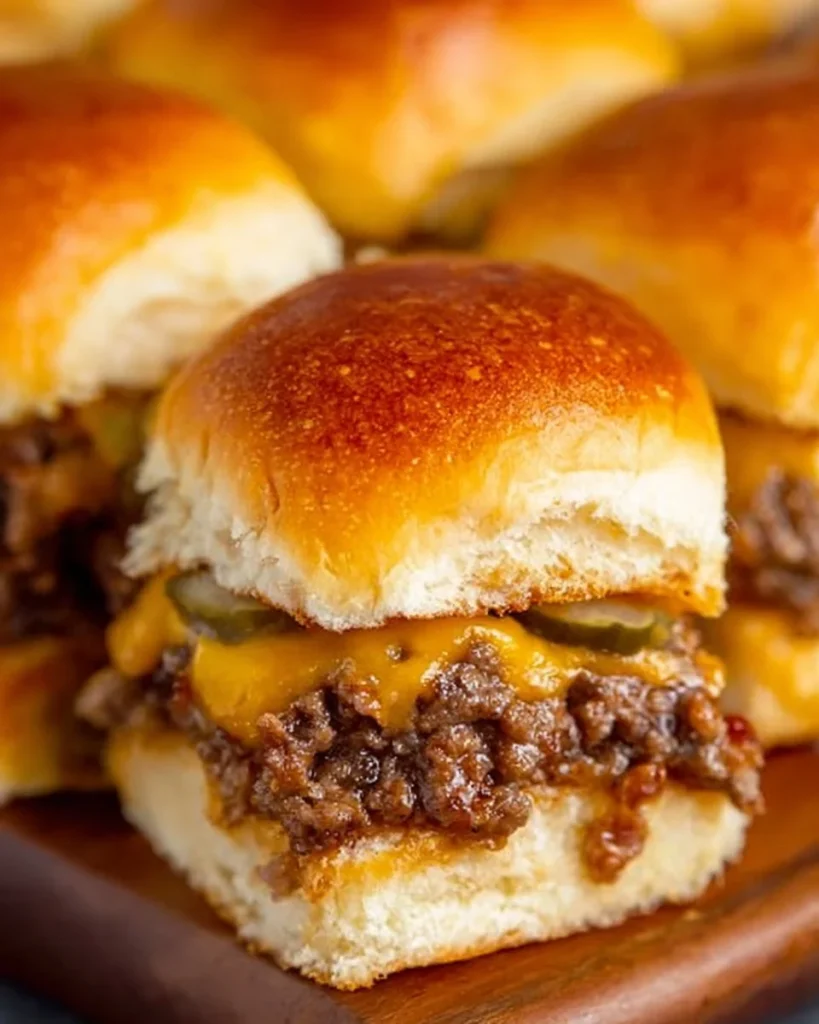
There’s something magical about sliders that transport me back to backyard barbecues and sun-soaked picnics. Whenever I make cheeseburger sliders, it’s like inviting a party into my kitchen—savory beef, melting cheese, and the perfect tangy crunch of pickles come together in a symphony of flavors that are hard to resist. These bites are packed with nostalgia and just the right touch of indulgence, and I honestly can’t think of a better way to share good times with friends and family.
Why you’ll love this recipe
So, why make these cheeseburger sliders? Well, my friend, let me break it down for you. First off, these sliders are perfect for any gathering, whether it’s game day or a casual family dinner. They’re incredibly easy to throw together yet taste absolutely fantastic! Each slider is a mini marvel, bursting with juicy beef and gooey cheese, all wrapped snugly in soft, buttery buns.
But it gets better. Unlike traditional burgers that can sometimes be cumbersome, these sliders give you just the right amount of food without leaving you feeling like you need a nap afterward. Plus, they’re super customizable! Want to add some sautéed onions or a dash of hot sauce? Go for it!
So, if you’re looking for something that’s sure to please a crowd—these sliders are a no-brainer. Let’s get cooking!
Gather these ingredients
First, let’s round up everything you need to bring these delicious sliders to life:
-
1 pound ground beef: Look for a good quality beef with a bit of fat—80/20 is my go-to. It gives the sliders that juicy, melt-in-your-mouth quality that’s simply divine.
-
1 teaspoon garlic powder and 1 teaspoon onion powder: These are your flavor boosters that add depth. Feel free to use fresh garlic or onions if you’re looking for that fresh punch!
-
Salt and pepper to taste: The simple seasoning can make all the difference. It enhances the beef flavor and elevates each bite.
-
8 slider buns: Grab some soft and fluffy slider buns. Brioche or potato buns add an extra touch of richness!
-
8 slices of cheddar cheese: Because what’s a cheeseburger without cheese? If you want to go a bit gourmet, try smoked gouda or pepper jack for a different flavor twist.
-
Pickles for topping: These crunchy delights add that necessary tang! Opt for dill pickles for a classic taste.
-
Ketchup and mustard for serving: The classic condiments that tie everything together. For a gourmet touch, add some aioli or relish to the mix.
How this recipe comes together
Now, let’s dive into the fun part—making these sliders! Trust me; you’ll feel like a pro in no time.
-
Preheat the oven to 350°F (175°C). This helps when you’re ready to warm those assembled sliders.
-
In a large bowl, mix the ground beef with garlic powder, onion powder, salt, and pepper. Massage it gently—don’t overwork it! You want to keep that grind intact for juicy patties.
-
Form the mixture into small patties that fit the slider buns. Just make them slightly larger than the buns, as they will shrink a bit while cooking.
-
Heat a skillet over medium heat and cook the patties for about 3-4 minutes per side until they’re cooked to your desired doneness. Give them a good sizzle—you’ll love the sound!
-
Place a slice of cheese on each patty. Allow it to melt perfectly over the meat. It’s like a cheesy blanket!
-
Assemble the sliders: Place a patty on each bun, then add pickles, ketchup, and mustard. Feel free to pile on the toppings if you’re feeling adventurous!
-
Optional: Place the assembled sliders on a baking sheet and warm them in the oven for about 5 minutes before serving. This step keeps everything cozy and melds the flavors beautifully.
Best way to enjoy it
Serving these sliders is all about creativity! You can present them beautifully on a platter with toothpicks for easy grabbing. Pair them with classic sides like crispy fries or a fresh salad for that perfect balance of flavors.
Want to jazz things up? Consider offering a variety of sauces—think barbecue sauce and chipotle mayo—the possibilities are endless! You could even make a homemade dipping sauce for some fun.
Storage and reheating tips
Got leftovers? Lucky you! Here’s how to keep them fresh. Allow the sliders to cool completely before storing them in an airtight container. They’ll stay good for about 3-4 days in the fridge.
For reheating, pop them in the microwave for a quick fix, or better yet, place them in the oven at 350°F (175°C) for a few minutes to re-crisp the bun and melt the cheese again. Trust me; it’s worth it!
Pro chef tips
Here are some quick tips to elevate your slider game:
-
Toast the buns: Lightly toasting the inside of the buns creates a lovely texture and keeps them from becoming soggy with the juices.
-
Don’t skip the resting time: Let the patties sit for a few minutes after cooking to allow juices to redistribute. This is magic for flavor!
-
Experiment with spices: Feel free to mix in your favorite herbs or spices—smoked paprika or chili powder can add a nice kick.
Creative Twists
If you’re feeling adventurous, there are countless ways to spin these sliders.
-
Veggie sliders: Swap the beef for black bean patties or a mix of quinoa and mushrooms for a hearty vegetarian option!
-
Southwest twist: Add some diced jalapeños to your beef mixture and top with avocado slices for a fresh take!
-
Italian Style: Try a mix of ground beef and Italian sausage with mozzarella cheese and marinara sauce for a delightful change.
Ingredients list
- 1 pound ground beef
- 1 teaspoon garlic powder
- 1 teaspoon onion powder
- Salt and pepper to taste
- 8 slider buns
- 8 slices of cheddar cheese
- Pickles for topping
- Ketchup and mustard for serving
Directions to follow
- Preheat the oven to 350°F (175°C).
- In a large bowl, mix ground beef, garlic powder, onion powder, salt, and pepper.
- Form patties that fit the slider buns.
- Heat a skillet over medium heat and cook patties for 3-4 minutes per side.
- Place cheese slices on patties to melt.
- Assemble sliders with patties, pickles, ketchup, and mustard.
- Optional: Warm assembled sliders in the oven for 5 minutes.
Your questions answered
-
What’s the prep time? Usually about 15-20 minutes—easy peasy!
-
Can I freeze them? Yes! You can freeze uncooked patties for up to 3 months. Thaw in the fridge before cooking.
-
What can I serve them with? Think classic fries, a fresh salad, or even sweet potato wedges!
-
Can I use other meats? Absolutely! Ground turkey or chicken could work nicely too.
-
How do I make them spicier? Add some cayenne pepper to the meat mixture or jalapeños on top!
There’s just something heartwarming about gathering around a table—sharing food, laughter, and stories. I hope you give these cheeseburger sliders a shot and let them become a new family favorite. So fire up that skillet, try your own variations, and make some memories. Can’t wait to hear how it turns out for you! Happy cooking!

Quick and Easy Cheeseburger Sliders in 30 Minutes
Description
These cheeseburger sliders bring a taste of nostalgia and perfect indulgence, combining juicy beef, melting cheese, and tangy pickles.Ingredients
Instructions
-
Preheat Oven
Preheat the oven to 350°F (175°C). -
Mix Ingredients
In a large bowl, mix ground beef with garlic powder, onion powder, salt, and pepper. Do not overwork the mixture. -
Form Patties
Form the beef mixture into small patties slightly larger than the buns. -
Cook Patties
Heat a skillet over medium heat and cook the patties for about 3-4 minutes per side. -
Add Cheese
Place a slice of cheese on each patty and allow it to melt. -
Assemble Sliders
Assemble the sliders on each bun with pickles, ketchup, and mustard. -
Optional Warm Up
Optionally, place the assembled sliders on a baking sheet and warm them in the oven for about 5 minutes before serving.
Nutrition Facts
Servings 8
- Amount Per Serving
- Calories 300kcal
- % Daily Value *
- Total Fat 21g33%
- Saturated Fat 10g50%
- Trans Fat 1g
- Cholesterol 60mg20%
- Sodium 600mg25%
- Potassium 300mg9%
- Total Carbohydrate 30g10%
- Dietary Fiber 1g4%
- Sugars 2g
- Protein 15g30%
- Vitamin A 500 IU
- Vitamin C 0 mg
- Calcium 200 mg
- Iron 2 mg
* Percent Daily Values are based on a 2,000 calorie diet. Your daily value may be higher or lower depending on your calorie needs.