There’s something undeniably magical about homemade granola bars. Honestly, they’re like the Swiss Army knife of snacks—perfect for that mid-afternoon slump, a grab-and-go breakfast, or a healthy addition to your kids’ lunchboxes. I remember the first time I tried making them; the aroma wafting through the kitchen felt like a warm hug. Trust me when I say once you make these bars at home, you’ll never want the store-bought versions again!
Why you’ll love this recipe
So, what makes this granola bar recipe a must-try? For starters, it’s about striking the perfect balance between nutrition and indulgence. These bars are packed with wholesome oats, crunchy nuts, and a hint of sweetness from honey (or maple syrup). They’re versatile too! You can mix and match your favorite dried fruits or add a sprinkle of chocolate chips for a little treat.
Not only are these bars naturally delicious, but they’re also chock-full of healthy ingredients. Think of them as your little energy boosters; they’ll keep you full and satisfied while fueling your day. Plus, making them at home allows you to control the ingredients—no preservatives or mystery additives here. With just a handful of pantry staples, you can whip up a fresh batch that rivals any cafe’s offerings.
Gather these ingredients
Let’s talk about the star players in this recipe:
- Rolled Oats (2 cups): The foundation of our bars. They provide that hearty, chewy texture and are packed with fiber to keep you feeling full.
- Nuts (1 cup): Think almonds, walnuts, or whatever you have on hand. Chopped roughly, they add crunch and protein. Feel free to toast them beforehand for an extra layer of flavor.
- Honey or Maple Syrup (1/2 cup): This is your sweetener. Honey brings a floral note, while maple syrup has that lovely earthy sweetness. Choose based on your preference or what you have available.
- Nut Butter (1/2 cup): Almond butter or good ol’ peanut butter works beautifully here. It will bind the ingredients together and add richness.
- Dried Fruits (1/2 cup): Whether it’s raisins, cranberries, or apricots, they bring that sweet and chewy element. You can also chop them for smaller bites.
- Chocolate Chips (1/4 cup, optional): Who can resist a little chocolate, right? Adding these provides a delightful contrast to the other flavors.
- Vanilla Extract (1 teaspoon): Just a splash elevates the overall taste, making each bite feel indulgent.
- Salt (1/4 teaspoon): A pinch of salt balances the sweetness beautifully and heightens all the flavors.
The cooking process explained
Alright, let’s dive into how to bring these delicious bars to life!
- Preheat the oven: Heat your oven to 350°F (175°C). Line an 8×8 inch baking dish with parchment paper. This will make it a breeze to lift the bars out later.
- Mix the dry ingredients: In a large bowl, combine the rolled oats, chopped nuts, dried fruits, and salt. Give it a good stir! You want everything evenly distributed so each bite is packed with flavor.
- Create the wet mixture: In a saucepan over low heat, combine your honey (or maple syrup) and nut butter. Stir gently until melted and beautifully smooth. Don’t rush this step; the magic is in the patience.
- Combine everything: Remove from heat and add the vanilla extract to your liquid mixture. Pour this over your bowl of dry ingredients, and mix until every morsel is coated. You can fold in the chocolate chips here too, if you’re feeling cheeky.
- Press it firmly: Transfer the mixture into your lined baking dish. Use a spatula or your hands (damp hands work great!) to press it firmly into an even layer. This helps your bars hold together.
- Bake to perfection: Pop it into the oven for 15-20 minutes or until the edges get a lovely golden brown. Keep a close eye—nobody likes burnt edges!
- Cool and chop: Once baked, let your bars cool completely in the dish (patience!). Once cooled, lift out using the parchment and cut into your desired size.
Best way to enjoy it
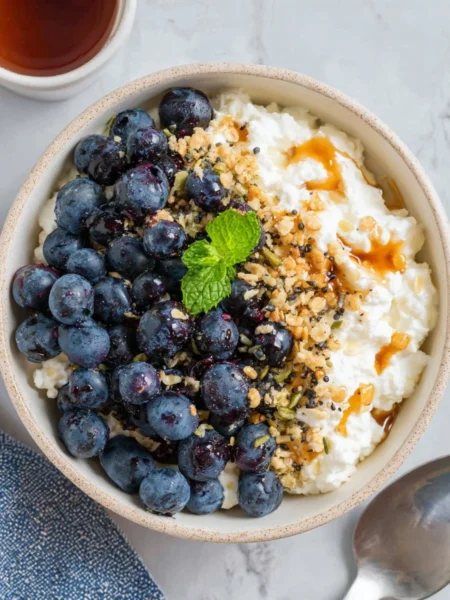
These granola bars shine on their own, but they love company! Try serving them with a dollop of Greek yogurt and fresh berries for a more indulgent breakfast. Or, crumble them over your morning smoothie for added texture. They make a great hiking snack too—just toss them into your backpack for that energy kick when you need it.
How to store
You’re going to want to keep these goodies fresh, right? Once cooled and cut, store them in an airtight container at room temperature for up to a week. If you want to prolong their life, wrap them individually in plastic wrap and pop them in the freezer. They can easily last a month or two this way. Just thaw them overnight in the fridge before enjoying!
Pro chef tips
Want to take your granola bars to the next level? Here are some of my favorite tips:
- Try toasting your oats and nuts before mixing—this really intensifies their flavors.
- Experiment with spices like cinnamon or nutmeg. A pinch can change everything!
- Use parchment to help with cutting—you can lift the entire batch out of the dish once cooled, making it much easier to cut into perfect bars.
- For added crunch, consider sprinkling some seeds—like pumpkin or sunflower—into the mix.
Creative Twists
Feeling adventurous? Here’s how you can switch things up:
- Add some coconut: Shredded unsweetened coconut will give your bars a tropical flair.
- Switch the nut butter: Cashew butter or sunflower seed butter can offer a completely new flavor profile.
- Use fresh fruit: If you’re making these right away, try incorporating fresh banana or apple for moisture.
- Go savory: Swap sweet dried fruits for something like dried tomatoes or olives for a completely unique bar!
Your questions answered
- How long does prep take? About 10 minutes—you’ll be snacking in no time!
- Can I make these gluten-free? Absolutely! Just ensure your oats are labeled gluten-free.
- What if I’m nut-free? Try using seeds instead of nuts and seed butter in place of nut butter.
- Can I add protein powder? Yes! Just reduce the oats by 1/4 cup to keep the balance.
- Do I have to bake them? While baking gives the best texture, you can dehydrate them if you have a dehydrator for a raw option.
Making homemade granola bars is not just about whipping up a snack; it’s about embracing creativity in the kitchen and boosting your snacks’ nutritional profile. Plus, you cater it to your taste buds exactly how you like! Whether you stick with the classic route or swap in your favorite flavors, I encourage you to try these bars out—your taste buds (and tummy) will thank you! So gather those ingredients, roll up your sleeves, and let’s get cooking. I can’t wait to hear how yours turn out!


Healthy & Delicious Homemade Granola Bars
Description
These homemade granola bars are the perfect snack for any time of the day, combining nutrition and indulgence with wholesome ingredients and customizable options.Main Ingredients
Dry Ingredients
Wet Ingredients
Optional Additions
Instructions
Baking Steps
-
Preheat the Oven
Heat your oven to 350°F (175°C) and line an 8x8 inch baking dish with parchment paper.This will allow for easy removal of the bars later. -
Mix Dry Ingredients
In a large bowl, combine rolled oats, chopped nuts, dried fruits, and salt. Stir well.Ensure even distribution for maximum flavor. -
Prepare Wet Mixture
In a saucepan over low heat, combine honey (or maple syrup) and nut butter, stirring until melted and smooth.Patience is key to achieving the right texture. -
Combine Mixtures
Remove from heat and stir in vanilla extract. Pour this over the dry ingredients, mixing until well coated.Fold in chocolate chips if using. -
Press and Bake
Transfer the mixture to the lined baking dish, pressing it firmly into an even layer. Bake for 15-20 minutes or until edges are golden brown.Monitor closely to prevent burning. -
Cool and Cut
Allow the bars to cool completely in the dish before lifting them out using the parchment paper and cutting into desired sizes.Cooling is crucial for the bars to hold together.
Nutrition Facts
Servings 12
- Amount Per Serving
- Calories 150kcal
- % Daily Value *
- Total Fat 5g8%
- Saturated Fat 1g5%
- Trans Fat 0g
- Cholesterol 0mg
- Sodium 30mg2%
- Potassium 150mg5%
- Total Carbohydrate 25g9%
- Dietary Fiber 3g12%
- Sugars 6g
- Protein 4g8%
- Vitamin A 0 IU
- Vitamin C 0 mg
- Calcium 20 mg
- Iron 1 mg
- Vitamin D 0 IU
- Vitamin E 1 IU
- Vitamin K 0 mcg
- Thiamin 0 mg
- Riboflavin 0 mg
- Niacin 1 mg
- Vitamin B6 0 mg
- Folate 1 mcg
- Vitamin B12 0 mcg
- Biotin 0 mcg
- Pantothenic Acid 0 mg
- Phosphorus 50 mg
- Iodine 0 mcg
- Magnesium 25 mg
- Zinc 1 mg
- Selenium 0 mcg
- Copper 0 mg
- Manganese 0 mg
- Chromium 0 mcg
- Molybdenum 0 mcg
- Chloride 0 mg
* Percent Daily Values are based on a 2,000 calorie diet. Your daily value may be higher or lower depending on your calorie needs.